I love vintage marquee letters and I have wanted one for a long time now. I don't have the money to buy an authentic one right now. I will one day though!! So I made my own marquee letter. It was super easy to make. This project is one that I almost gave up on! I bought this spray paint and thought it would work. Soon to realize it was going to blend in with my dark grey walls. I should have just tested the paint first to see but I didn't! I have some green spray paint left over from a previous project and thought I would give green a try. I went back inside to work on some other things and about 15 minutes later I went to check on it. It was floating in the pool. :( Lesson learned!! Do not spray paint anywhere near a pool on a windy day! I ended up not liking the color, it didn't look bad but it didn't match the image in my head :( So I tried the spray paint that I had originally purchased and I loved it. It kinda blends in with my walls but I don't care! I really like the way it turned out!!
Things you will need:
*I was so excited to start this projects I forgot to take a picture of everything a the beginning!! Oops!
*I was so excited to start this projects I forgot to take a picture of everything a the beginning!! Oops!
Paper mache letter (Joann)
Rust-Oleum Satin Metallics spray paint (walmart)
X-acto Knife
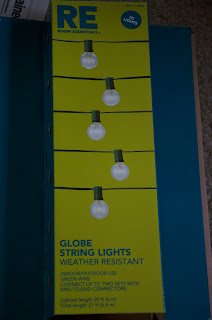
Globe String Lights (target)
Packing tape
Step 1: Cut off the top of your paper mache letter. You can always use the top piece for another project.


Step 2: Spray paint a couple of coats on your letter. I did 2 coats. Let it completely dry.

Step 3: I took the bulbs out of all of my string lights because they were getting tangled and I did not want the glass bulbs to break. You don't have to do that step, but it helped me. Now this step I just eye balled. I took two bulbs and held them in the letter and got them lined up how I wanted. Then I took a pen and put a little dot right under the bulb. If you have an easier way of doing this process, do it!! *Make sure when you take the bulbs out, you take them off at the end you do not plug it in at!!

Step 4: Take your x-acto knife and put an X right though the dot. You may have to adjust the size a little. Then I used a pen and pushed it through the X to open it up.


Step 5: Place the all the light bulbs in the holes and take the string of lights and start attaching the bulbs. I didn't attach the rest of the lights. I have those for back up now!

Step 6: Plug in your lights to make sure all the bulbs are lit up. Now unplug your lights and turn your letter over andtry to tape down the wires. Mine just did what they wanted!!

 *looks a little better right?!
The tricky part is hanging it on the wall. I hot glued some fishing string to the back and put a long nail in the wall. There is probably an easier step to this!!


Packing tape
Step 1: Cut off the top of your paper mache letter. You can always use the top piece for another project.


Step 2: Spray paint a couple of coats on your letter. I did 2 coats. Let it completely dry.

Step 3: I took the bulbs out of all of my string lights because they were getting tangled and I did not want the glass bulbs to break. You don't have to do that step, but it helped me. Now this step I just eye balled. I took two bulbs and held them in the letter and got them lined up how I wanted. Then I took a pen and put a little dot right under the bulb. If you have an easier way of doing this process, do it!! *Make sure when you take the bulbs out, you take them off at the end you do not plug it in at!!


Step 4: Take your x-acto knife and put an X right though the dot. You may have to adjust the size a little. Then I used a pen and pushed it through the X to open it up.


Step 5: Place the all the light bulbs in the holes and take the string of lights and start attaching the bulbs. I didn't attach the rest of the lights. I have those for back up now!

Step 6: Plug in your lights to make sure all the bulbs are lit up. Now unplug your lights and turn your letter over and


The tricky part is hanging it on the wall. I hot glued some fishing string to the back and put a long nail in the wall. There is probably an easier step to this!!


No comments:
Post a Comment