Sunday, March 2, 2014

Easy Refrigerator Magnets


Here are a few easy steps to recreate these really cute and easy refrigerator magnets.

What you will need:
Clothes pins
Scrapbook paper (Michael's)
Magnet strip (Lowes)
E6000
Scissors
Pen or Pencil

Step 1: I got this little book of paper at Michael's and it works perfectly for these clothes pins. You can use any scrapbook paper you like! Cut out the strips of paper. Make sure you are cutting out the part of the pattern you want on your clothes pin. 


Step 2: Put a light amount of E6000 on your clothes pin. You don't want to put too much because it will run over the edges and make a mess! I have never used E6000 before. I love the strength of the bond but I hate the packaging. You barely squeeze it and it just overflows for a while. I feel like you waste a lot the product which I don't like to do! Just my little rant!


Step 4: Place your strip of paper on the clothes pin. The E6000 takes a while to dry. So you have a few minutes to make adjustments but then leave it to dry for a good 15 to 20 minutes to make sure it doesn't move when you are attaching the magnet. 


Step 5: Once It is dry, turn the clothes pin over and put a little E6000 on it to attach the magnet strip. Mine had a sticky back but I didn't trust it! My magnet strip is also a little wider than my clothes pin but that doesn't bother me. You can't really see it unless you are looking for it. My magnets were bent because of the way it was packaged and I wanted to make sure the whole strip would be flat on the clothes pin, so I added a few rocks from a previous projects on top of it while it dried. Let It dry for another 15 to 20 minutes and it's ready to go!! 


Saturday, February 8, 2014

Diy Chalk Board


 There is something special about writing on a chalk board. 
It reminds me of when I was in elementary and middle school. 
I decided it was time for me to make a chalk board! 
I had this project in the works for a few months but with it being so cold outside I couldn't work on it. Since the weather is pretty odd here in Mississippi during the winter, we got a random warm day and jumped on this project.
 Of course it wouldn't be complete without a trip back to the store in the middle of the project because I ran out of spray paint.
 I should really plan these projects out a little better!! 
This project is pretty easy but it is very time consuming. I hope you enjoy watching paint dry because you do a lot of it!


What you will need:
Chalkboard paint 
Spray Paint (sea glass by Krylon from Michael's)
Krylon crystal clear
Paint tape
Newspaper
Sandpaper
Chalk
Mirror or picture frame

Step 1: Wipe down your mirror or picture frame to make sure there is little to no dust. My mirror is very detailed and almost impossible to get all the dust off! *I forgot to take a before picture and this is the only one I had of it! 


Step 2: Tape the glass off using the newspaper to help cover most of the mirror or picture frame. Spray a few coats of your spray paint on the outside. This is where I had to run back to Michael's! I ran out of spray paint half way through. I guess I didn't realize how big this mirror was. 


Step 3: The spray paint that I got was satin finish and it had a little bit of a shine too it I wanted it to have a little more. I applied 2 coats of this Krylon Crystal Clear


Step 4: Sand the glass so the chalk board paint will stick better. It is what the directions said to do! I used 80 grit but whatever you have on hand will work. The finer the paper the longer it will take but it will work. The mirror almost looks cloudy but that is where I have been sanding.


Step 5: Tape off the spray painted edges using more newspaper to help cover the outside. The frame is so detailed, it took forever to tape it off. Well worth it in the end but definitely the worst part.


Step 6: Spray the chalk board paint. I did about 3 light coats. It said to wait an hour or so in between coats but the sun was going down and I was loosing daylight quickly so I just waited a few minutes in between each coat. I let it dry overnight maybe a little longer just to make sure it was good and dry. Then I took the side of a piece of chalk and rubbed it all over the board to "season" the board. Just erase that and you are good to go. 


*I recommend using the brush on because after I seasoned my board I noticed it was chipping a little in some spots. That could have been because I didn't wait an hour in between each coat but in the future when it is looking a little worn out I will put a few coats of the brush on paint. Another note with the spray paint the finish is going to be very smooth and with the brush on you might see a few brush strokes. 

Monday, December 9, 2013

Cute JOY craft

Cute and Easy JOY Christmas craft


What you will need:
J and Y Wood Letters
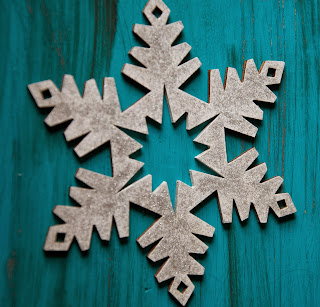
Snow Flake Ornament
White paint
Blue Paint
Glitter Paint
Small Piece of cardboard 
Hot Glue


Step 1: Paint your J and Y letters blue. I put a couple of coats on mine. I didn't paint the back of mine because you can't see the back where I am putting it.  


Step 2. Paint your snowflake white then with the glitter paint. This step took a while because of all the detail. I did a couple of coats of the white and glitter too. 


Step 3. Once your letter and snowflake are dry you are going to hot glue the J, snowflake, and Y together. Then you will put a little glue on the bottom of your letters and glue that to the piece of cardboard. I cut out a small piece from a paper mache T that I had from a previous project. If you get bigger letters they might stand up fine on their own but mine would not. I didn't paint my cardboard because it's higher up and you can't see it.


Monday, November 25, 2013

DIY Snow Globes


This project is a great alternative to snow globes with water. I have seen these the past couple of years and just never got around to making some! It was super easy and only took about 10 minutes to make too! You can use any empty jars you have around the house. We had an empty salsa jar and I cant remember what the small jar is. The possibilities are endless!! 


What you will need:
Jars With Lid (any kind work!)
Fake Snow
Little Trees (Michael's)
Hot Glue

Step 1: Wash your jars and remove any labels. Center your tree in the middle of the lid. Hot glue your tree down. 


Step 2: While the glue is drying, put some of the fake snow in the bottom of the jar. I just put enough to cover the bottom. You can always add more if necessary. 


Step 3: Once the glue has dried, screw the top on the jar and shake it a few times to get the snow scattered around. Set up and enjoy!


Thursday, November 14, 2013

Glitter Ornament


Christmas is my favorite time of year. I start celebrating Christmas a lot earlier than I probably should!! But that doesn't stop me! I am so excited to get
 started on all my Christmas crafts for this year. I am so thankful for starting this blog so I can go back and see what I made without having to get all the decorations down! I made some stuff for my mantel last year and I can not remember anything that I made for it. That is sad!! 


What you will need: 
Pledge Floor Care  
Plastic or Glass Clear Ornament (Michael's, Joann) 
Glitter

Step 1: Take the top off your ornament. Be careful to not bend the top.


Step 2: Squirt a small amount of pledge floor care in the ornament. Sounds crazy but the pledge acts as your glue to keep the glitter in place and it dries clear! 
Do not shake the ornament as it will create bubbles!! Just gently swirl the ornament around making sure you cover everything. Pour the rest back in the bottle. 
I turned my ornament as I poured the liquid back in the bottle to make sure I covered the very top. You don't see that part once you put the top back on though. 
Just a personal preference. You will want to work quickly on steps 2 and 3 so it doesn't dry.


Step 3: Now the glitter!! I made a funnel from a piece of paper but if you have a funnel on hand that works too! Pour more glitter than you think in the ornament. 
Now start to slowly spin the ornament to cover the inside with the glitter. Go over places a few times just to make sure you don't miss anything! 
The tricky part is getting the glitter back in the bottle if you are using a small bottle of glitter like I am. That is when the paper comes in handy because you can form it to fit in the bottle. Now pour your excess glitter back in the bottle.
 Pop the top back in your ornament and put on your tree to enjoy!! 


Monday, October 21, 2013

DIY Wood Pumpkins


What you will need:
4-1x4 blocks cut to 6 inches
4-1x4 blocks cut into 7 inches
4-1x4 blocks cut into 8 inches
1 inch blocks
Brown paint
Orange paint
Hot glue
Sand paper (optional)

Step 1: Cut out all of your wood blocks and lightly sand the sides. Sanding is just an option. 

Step 2: Get all of your 6 inch blocks and glue them together. Paint the outside and top. I didn't paint the backs of mine. Some spots I had to go over a couple of times with paint, but mainly I did 2 coats of paint. 


Step 3: Take two 7 inch and two 8 inch boards. Start with a 7 inch board then put the two 8 inch in the middle, and end with a 7 inch board. So it should be 7 inch 8 inch 8 inch 7 inch.  Try to center your 7 inch boards on your 8 inch boards and glue those together . It does not have to be perfect! Paint those a couple of times, going over some spots more if needed.

Step 4: Repeat step 3 again with the last 7 inch and 8 inch boards. 


Step 5: Take 2 blocks and glue them together then glue one in the center. I did that twice and then just glued two together. Tried to change it up a little! Paint those brown, like with the pumpkins I did not paint the backs. They wont be seen where I am going to put them. 


Step 6: Take your 6 Inch pumpkin and glue one of the three blocks on top in the center. Again it doesn't have to be perfect! Take one of the 7 inch and 8 inch ones and lay it on its side. Glue the last 3 block topper in the center. Take the last pumpkin and glue the 2 blocks  on the top in the center. You can do the three block combo on all of them. I was just changing it up a little bit. 


Friday, October 18, 2013

DIY Halloween fabric wreath


I made myself one of these wreaths last year and when I got my fabric, I got too much. So I thought I would make another wreath this year and try to sell it. Why not right! Funny thing is I ran out of one of the fabrics and they did not have the same one again this year! So I bought a similar one and just added the new fabric around the wreath to help blend it in. This project took me about two days. Your fingers will start to hurt from putting the fabric though the wreath and tying it but it is so worth it. 

Things you will need:
12" wire wreath (you can go bigger but you
 will need a little more fabric)
Floral wire (I used 16 gauge and that was a little too thick 
so I would say 20- 26 gauge will be fine)
Wood letters
Scissors
Hot glue
Green paint
Glitter paint
3-5 different fabric choices (Depending on how many different 
fabrics you choose will determine how much fabric you need.
 If you only find 3 that you like then get half of a yard to make
 sure you have enough. If you find 4 or 5 
different fabrics you could use less.)


Step 1: What I did was cut my fabric into about 5 inch long strips then cut 1 inch strips out of those. It doesn't have to be perfect. 

Step 2: Weave a strip of fabric through one of the sections on the wire wreath and double knot it. So that way it shouldn't unravel.


(Step 1 and 2 take a while so I watched tv while I did those!!)

Step 3: Paint your wood letters green. I did about two coats on mine. When they are completely dry, do several coats of the glitter. I like this stuff because it doesn't fall off! 

Step 4: Place your letters on your wreath to see where you need to glue the wire. Cut your wire to 5 to 7 inch long. Give or take. Bend the wire to make it kinda flat in the middle and hot glue that to your wood letter. I did 2 sets of wire for each letter. 


Step 5: Once the glue is dry, wiggle your wire through the fabrics and twist your wire to attach it to the wreath. Cut any extra wire off the ends. I took some pliers and bent the wire down so it would not poke anyone. 
* I couldn't wiggle the wire and take pictures!
* It's hard to see but if you look closely you can see the green wire.